New bed, fresh start! If you’re setting up a garden from scratch, mulching with wood chips is one of the smartest moves you can make. This beginner’s guide to wood chips gives you clear, step-by-step instructions on how to mulch a garden bed so it holds moisture, stays cooler in summer, suppresses weeds, and builds richer soil over time. Perfect for mulching a new garden bed at home.
Why Choose Wood Chips?
- Excellent moisture retention and temperature buffering
- Top-tier weed suppression when applied at the right depth
- Long-lasting (slower to break down than straw/sugarcane)
- Builds soil as it decomposes into humus
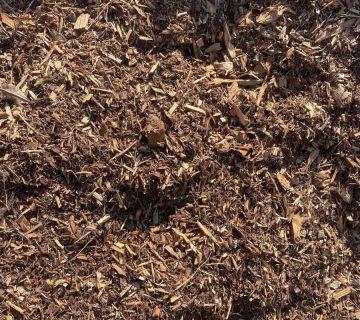
Tip: Use clean, untreated wood chips (arborist chips or composted bark/wood blend). Avoid dyed or contaminated products near edibles.
What You’ll Need
- Wood chips (see “How much to buy” below)
- Garden fork or spade
- Rake (landscape rake if available)
- Hose/watering can (or drip/soaker hose)
- Optional: compost (2–3 cm), soil wetting agent (for hydrophobic soils), edging materials, cardboard or weed mat (selectively)
Step-by-Step: Mulching a New Garden Bed (Wood Chips)
1. Mark Out & Prepare the Bed
- Define the shape and install edging if desired (steel/plastic/timber).
- Remove tough weeds (rhizomatous grasses, nutgrass) by hand—roots and all.
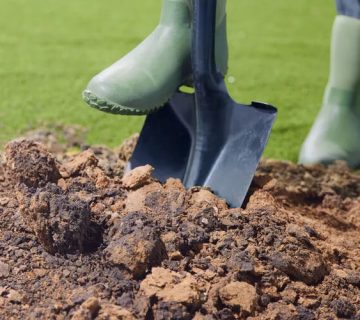
- Loosen soil lightly with a fork (don’t over-till). If soil is dry, water deeply.
2. Improve the Base (Optional but Ideal)
- Spread 2–3 cm of compost over the soil to kickstart biology and structure.
- If water beads on the surface, apply a soil wetting agent before mulching.
3. Lay Irrigation (Best Practice)
- Place drip line or soaker hose on the soil surface. Mulch goes on top.
- Test the system briefly so you know it’s delivering water evenly.
4. Plant First, Then Mulch
- Set plants to their correct depth and water them in.
- Gently firm soil around roots and top up soil level if needed.
5. Apply Wood Chips (The Right Depth)
- Spread wood chips 5–7 cm deep for general beds.
- Around veg/seedling areas, use 3–5 cm so stems aren’t buried.
- Keep a 5–10 cm gap around stems and trunks (no “mulch volcanoes”).
- Rake to an even, level finish.
6. Water the Mulch In
- Give the entire bed a thorough soak to settle chips and remove air gaps.
- Check that irrigation still runs freely beneath the mulch.
7. Top Up & Maintain
- Inspect depth each season. Top up when coverage drops below 3–4 cm.
- Pull chips back from stems as plants thicken. Keep the collar clear.
How Much Wood Chip to Buy?
As a guide, 1 cubic metre covers:
- ~20 m² at 5 cm depth
- ~14 m² at 7 cm depth
Formula:
Area (m²) × Depth (m) = Volume (m³)
Example: 12 m² × 0.05 m = 0.6 m³
Where to Use a Weed Barrier (and Where Not To)
- Cardboard/newspaper: Useful over weedy patches; overlap sheets by 10–15 cm, wet thoroughly, then mulch on top.
- Weed mat: OK for paths or non-planting zones. Avoid underactive garden beds—it can restrict root and soil life exchange.
Best Practices & Pro Tips
- Fresh arborist chips are fine on the surface. If you’re concerned about nitrogen tie-up in veg beds, sprinkle a light organic fertiliser before mulching.
- Don’t mix chips into soil—keep them on top. Mixing can bind nitrogen right where roots feed.
- Keep chips away from house slabs to minimise termite risk (regional).
- For young seedlings, start thinner (3 cm) and add more as plants establish.
- On slopes, pin with jute mesh or create gentle contour berms to prevent slippage.
Common Mistakes (and Easy Fixes)
- Mulch volcanoes around trunks → stem rot and pests.
- Fix: Create a donut: clear collar of 5–10 cm around stems/trunks.
- Fix: Create a donut: clear collar of 5–10 cm around stems/trunks.
- Too thin (<3 cm) → weeds push through.
- Fix: Top up to 5–7 cm.
- Fix: Top up to 5–7 cm.
- Too thick (>10 cm) → reduced airflow, water repellence.
- Fix: Rake back to the sweet spot.
- Fix: Rake back to the sweet spot.
- Dry, hydrophobic soil under mulch → water won’t penetrate.
- Fix: Pre-soak soil and use a wetting agent before mulching.
- Fix: Pre-soak soil and use a wetting agent before mulching.
- Skipping irrigation under mulch → water struggles to reach roots.
- Fix: Install drip/soaker lines on soil, then mulch over.
- Fix: Install drip/soaker lines on soil, then mulch over.
Safety & Sourcing
- Wear gloves and a dust mask if you’re handling very dry chips.
- Source clean, local wood chips; composted bark/wood blends are excellent for ornamentals and trees.
Maintenance Schedule (Simple)
- Seasonally (Autumn/Spring): Top up to 5–7 cm.
- Summer: Patch thin, sun-baked areas; check irrigation flow.
- After heavy rain/wind: Rake back displaced chips; repair edges.
Quick Checklist
- Bed edged, weeds removed, soil lightly loosened
- Compost (2–3 cm) added and soil pre-watered
- Drip/soaker hose placed on soil and tested
- Plants installed and watered in
- Wood chips spread to 5–7 cm (3–5 cm around veg)
- Clear 5–10 cm gap around stems/trunks
- Mulch watered in thoroughly
- Depth checked and topped up seasonally
Need Mulch?
Diggers Landscape Supplies has the mulch you need — in stock and ready to go. Order now and get the right mix for garden beds, top-dress, turf underlay, and more.
Frequently Asked Questions
Will wood chips steal nutrients from my plants?
Not when used on the surface. Nitrogen tie-up is primarily at the chip–soil interface; a light organic feed before mulching or a compost under-layer avoids issues.
Are wood chips OK for veggie beds?
Yes—use a finer, well-composted chip and keep to 3–5 cm. Maintain a clear collar around tender stems.
How long do wood chips last?
Typically 6–18 months depending on climate and chip size. Top up to maintain coverage.